Showing posts with label How To. Show all posts

Tuesday, April 28, 2015

1 How to Add Custom Resolution Mac OS X

   Hi, today i want to share my experience. I am using an external monitor with thunderbolt-VGA adapter connecting my macbook air to an LG W1941S monitor. Unfortunately, my monitor won't show its native resolution.
   For you who wonder how to set a custom resolution in mac os x environment or run your monitor at native resolution, the solution is App called SwitchResX . This app is not free, but i think it's worth paying since it gives a lot of options.
   Let's jump straight in!

1. First, download SwitchResX (which is trial, you can purchase it if you like it)
2. After it's completed, you'll have a .zip file, just extract and then install them.
3. After you follow every step and got it installed, open it. You won't find it in apps, it shows on System Preferences. - however, it automatically shows up after installation.


4. In the SwitchResX preferences, you'll see your displays. There, you'll find some tabs, one of them is Custom Resolution.

5. It might shows blank space like so, or if you're using default macbook display, it should show some custom resolution. Now, make a new custom resolution by clicking add (+) button under the list.
6. You'll provided with a box where you can customise your own resolution. You can select from 3 options : scaled, standard, or custom.
i suggest selecting custom only if you know what you are doing. Standard is the most reliable one, for example, we uses standard preset.

7. Then, choose desired resolution that is already provided in the list. And click OK if you're done.
8. Now, you should see custom res. you just created on the list, showing "Not installed" status.

9. Save your work (Cmd+S) and status will change to "Need Reboot"
10. You're good to go, reboot your computer. After reboot, you should see your custom resolution in system preferences (if not, head to "current resolution" tab step4)


- To change your resolution (or adjust other settings) quickly, you can enable menu. By heading to menu, and tick "is active and contain" option. Small quick access will be shown on your menubar! i think it's quite handy having a quick access to your all-in-one display configuration. 


That's all! hope it helps you who having trouble with mac os x resolution! If you have questions, just comment down below, i'll reply asap if available. Thanks
Sunday, April 5, 2015

0 How to Install Japanese Font in Linux

Japanese font is not installed by default in Linux (as i experienced).
For example, if you have a file with japanese font name, it might not visible - just white blank space.
So, here is simple way how to install japanese font on your linux machine.

1. Goto terminal (Ctrl+Alt+T)
2. type the following command :

Ubuntu/Debian :
  
# apt-get install fonts-takao-mincho 
# aptitude install -P fonts-takao-mincho
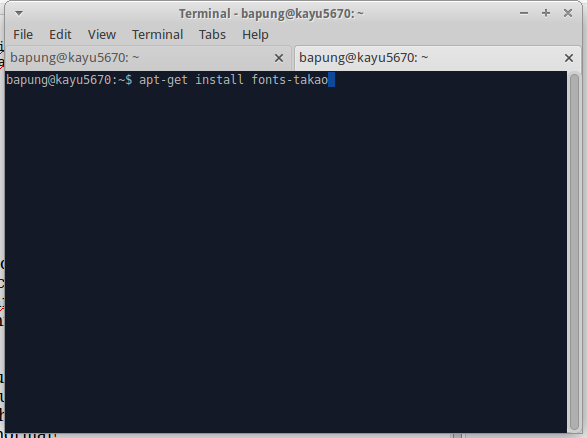
# apt-get install fonts-takao

Fedora :

# yum install fonts-japanese

Arch Linux :

# pacman -S ttf-sazanami


3. Enter, input Y if prompted!
4. Wait until installation is complete
5. You should see your japanese character now, e.g. in Rhythmbox, when you have song with jap font, which previously unseen, now it should visible!

NP:
- Ignore hash ( #) when you write the command!
- If you have permission issue / something like permission denied add "sudo" before the command, and then enter your password, it should look blank, keep typing your password, it's normal!
      your command should be like " sudo apt-get install fonts-takao "

If you have questions, just leave a comment! Thank you

Friday, August 17, 2012

0 How To : Jailbreak iOS 5.1 with Redsn0w

The limitation of the software in the AppStore usually make us annoying. Not only the price, but also the availability of necessary softwares. Some people like to pay, but if you want to more stuffs without limitation in AppStore, you can try Jailbreak your gadgets. Actually jailbreak is easy as simple as you copy files among devices. The supported devices are :


OK, the steps are :

1. Download Redsn0w [MAC/WINDOWS]
2. Connect your device to your PC/notebook (can be windows or macintosh).
3. Run Redsn0w, after the window is shown, click "jailbreak", then click "Cydia".
4. Wait, and your device will reboot automatically. After reboot, you shouldn't find anything change, except Cydia icon on your home screen.

Happy Jailbreaking

Tuesday, April 19, 2011

0 GPU Overclock Guide

You have a GPU, but, it works slow?
Now, i will show you how to boost your GPU performance
This way works with improve increase your GPU clocks directly.
These are the steps :
1. Download RivaTuner 2.24c from Guru3D.
2. Install RivaTuner 2.24c and if you are asked for install update, select install update.
3. Run RivaTuner (If show unsupported drivers, ignore it).
4. Wait RivaTuner to scan your hardware, registies for Forceware, Catalyst 
5. If your GPU(s) are nVidia will be shown Forceware detected, and if your GPU(s) are AMD will be shown Catalyst detected.
Note: Don't Overclock your Integrated GPU, only for dedicated GPU
6. Click Triangle next to "Forceware/Catalyst detected"
7. RivaTuner will show new window. Give check "Enable hardware level overclocking"
8. Now, select Performance 3D and slide the slider below "GPU clock", "Memory clock", and "Shader clock"(if supported) until you find desired clocks.
9. If you have found desired clocks, now, click Save under Startup settings and check "Apply Overclocking at Startup".
10. Apply and OK.

I try above steps using GPU nVidia GeForce 9600GT
And I have done benchmark for it (3Dmark 2003) 1024x768 noAA. 
1. Before overclocking (450 Mhz, 500 Mhz, 1000 Mhz) the result is 15990
2. After overclocking ( 600 Mhz, 625 Mhz, and 1250 Mhz) the result is 16450

It also increase Frame Rate while i play Crysis : Warhead at mainstream settings, about 2.5 - 3.25 fps.

Note : Only slide the slider between blue indicator (save overclocking, no other cooler needed) 

Friday, February 11, 2011

2 How to Install Google Android x86 ?

Install Android x86 (Live CD / USB)

Android x86 has implemented easy installer to install android x86 to your harddisk, android has support following partition types (System Files).
1. NTFS (New Technology File System)
2. FAT32 (File Allocation Table 32)
3. Ext3
4. Ext2
That mean you can install it with your windows.

Step by step :
1. Boot from Android x86 installation CD/USB, select "Installation-Install Android to harddisk", as the picture below.


2. After your boot has completed, you will see partitions configuration's dialog. You can select one of your partitions to install Android, or you can create or modify the partitions with select "Create or Modify Partitions". Note : If target drive not shown, try "Detect Devices"


3. Android can be installed side by side with other Operating System, or the data in your selected partition. If partition will be formated, you can select "Do not Format" to save the data in your selected partition. Note type of partition, the selected one must same with ID partition, or boot loader will failed to boot.


also note if you select to formating to FAT32, you will see a warning dialog box, if android can't save all data for FAT32. You still can continue to install, but, the android system that installed will work as Live CD. That mean all data will be lost if the machine has powered off. Therefore, we don't suggest to install Android x86 to FAT32 partitions.

4. The next question is "Do you want to install boot loader GRUB?". Commonly you must answer "YES", except if you want to install it by yourself. Note : Boot Installer just create items for Android x86.If you want other Operating System, you need to add items to the  /GRUB/menu.lst manually. See article about "Advance  Multi-Boot"


5. Now, your Installation has started and you can see Installation Progress bar.


6. OK, wait a few minutes, and you will see a dialog box below. Congratulation, your installation has finished successfully. Now, you can start Android x86 directly, or reboot and run it.


Advanced Multi-Boot


To boot to another Operating System you must add items for that OS in this location  /GRUB/menu.lst. For example, for windows, add the following codes :

        Codes :
      tittle Windows
       rootnoverufy (hd0,0) rootnoverufy (hd0, 0)
       chainloader +1 chainloader +1

This assume if windows installed in the first partition of first harddisk. Or, you must change the rootnoverify to the appropriate values. See GRUB manual for details.


Download :


If there are broken links report to me....
Thank you. (/bps)